
I love displaying photographs of family, but there’s only so much wall space in our house. I also love silhouettes, but run into the same problem – where to put them? I decided to create something functional and personal out of this photo.


Here is a tote bag I made using a silhouette of that picture of Conor at 10 months.
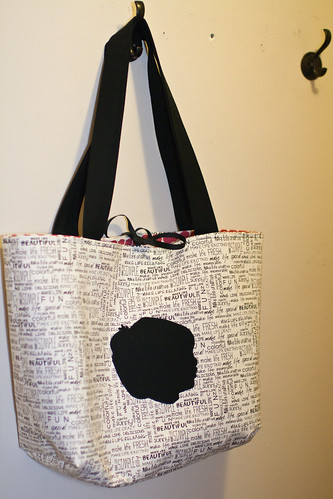
It was made from the Jordy Tote pattern that can be found here. This would also be a cute way to appliqué a silhouette onto a throw pillow, tea towel, zipper pouch… The possibilities are really endless! Here's a little tutorial on how to make your own fabric silhouette to embroider on a piece of your choice.
It was made from the Jordy Tote pattern that can be found here. This would also be a cute way to appliqué a silhouette onto a throw pillow, tea towel, zipper pouch… The possibilities are really endless! Here's a little tutorial on how to make your own fabric silhouette to embroider on a piece of your choice.
Materials you will need.
- Fabric according to you pattern.
- Fabric for your silhouette. Black cotton works well, such as Bella Solids by Moda Fabrics in Black. You don’t need much - you can make several from ¼ yard.
- Fusible webbing suitable for sewing, such as Heat N Bond Lite.
- embroidery scissors
**Wash all your fabric and iron well before starting.**
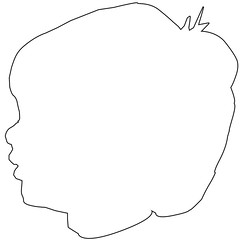
Make an outline of your subject.
This is one way to make a silhouette using Photoshop. I believe this can also be done in GIMP if you don’t have access to Photoshop – there are tutorials out there. Or, send it to me and I'll do it for you! :)
Find a photo with a good side profile – the subject’s gaze should be as parallel to the plane of focus as possible. A light, plain background is also helpful but not absolutely necessary. It doesn’t have to be perfect - chances are you have at least one photo that will work.
Import the photo into Photoshop. Duplicate the background layer and create an outline around the head using the pen tool. (Magnetic Lasso also works but is less exact.) Make sure “shape layers” is selected and adjust the opacity of the layer to ≤25% so you can see the subject. When going around tiny details like whisps of hair and eyelashes, it’s easier to use chunkier shapes than to try and outline every. single. hair. This will also make the latter steps easier. For example, in my picture, I made a fairly generous outline around the hairs sticking up on the top of his head.
Create a new file in Photoshop and copy your outline layer to the new file.
In the Layers palette, reduce fill to 0% but keep opacity at 100%.
Click “Add Layer Style Icon” on the bottom toolbar of the Layers palette and choose “Stroke”.
Set the Stroke Size to approximately 6px, Position = center, Blend mode = normal, Opacity = 100%, Fill Type = color (Choose Black). You'll need a nice, bold line to trace.
Resize to the desired size, depending on your project. My silhouette was about 5 inches x 5 inches. If you care which way the silhouette is facing, flip the image horizontally (Image > Rotate Canvas > Flip Canvas horizontal). The final product will be the reverse of the printout. I didn't do this so my final product is the reverse of my picture.
Print your silhouette.
Create a fabric silhouette.
Place a piece of fusible webbing over the printout (coated side down against the paper) and secure around the edges with tape. Trace the silhouette. If you like, use a little artistic license to alter the shape of the hair, or add a bow or a fancy collar, for example.
Remove the piece of fusible webbing and place it, coated side down, on the fabric you are using for the silhouette. (Most likely this is a solid black, but if it’s a print be sure to do this on the wrong side of the fabric.) Press according to the directions on the webbing package.
Use embroidery scissors to cut out the shape. Peel away the paper backing.
Apply the silhouette to your fabric.
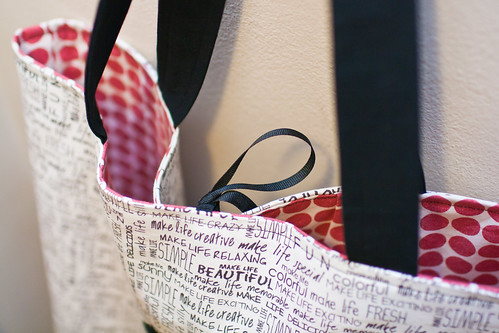
The best time to do this is after you cut the pieces out but before you assemble them. If you’re applying the silhouette to a piece of fabric that will have interfacing (as with the tote bag example here), apply the interfacing first.
Iron the background fabric well. Situate the silhouette, webbing down, and iron in place.
Now you can embroider the silhouette. Use whatever method you’re comfortable with. I used a fairly narrow and short zigzag stitch.
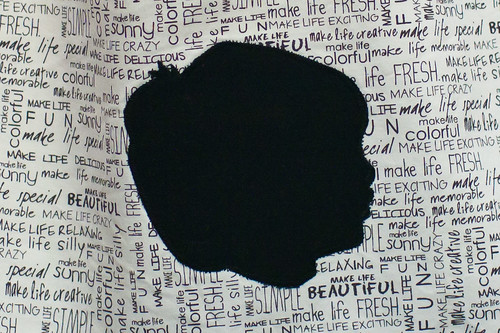
Viola! Now assemble the rest of your pattern and you’re finished.
Very cute! This is a great idea for Christmas presents...
ReplyDeleteWhat a great idea. Turned out great!
ReplyDeleteAwesome bag - I love it!
ReplyDeleteI just love this ~ too adorable!!!!
ReplyDeleteI love that the Carmody cowlick will forever be immortalized in the silhouette! ;)
ReplyDelete